博主
258
258
258
258
专辑
- 跟着禹神学Vue3 1
- Vue3+Element Plus 12
- hutool工具包的使用 13
- 学习笔记zg4 25
- javaweb专辑 2
- gradle专辑 1
- 学习笔记zg2 25
- LeetCode学习 1
- Redisson分布式锁架构 4
- 学习笔记zg6 4
- java面试问题扩充 1
- 消息中间件学习 3
- 学习笔记20230815 11
- Vue3编程专辑 3
- 图片 1
- JVM诊断调优工具Arthas 教程到实战 8
- AOP专辑 3
- ChatGPT问答专辑 4
- kafka 1
- HBase数据库专辑 6
- 第三方接口访问方法 5
- 课堂笔记 1
- 分布式文件存储系统MinIO 5
- Linux运维与安全 4
- Kubernetes专辑 2
- 11 1
- VMWare使用专辑 3
- 线程池 1
- Spring面试 1
- Mycat 2
- Spring 自定义注解与Aop 2
- FFmpeg 1
- ElasticSearch 1
- 面试八股文 5
- mysql 1
- Mybatis 1
- docker 1
- vscode开发vue程序的环境配置 3
- DFA 算法实现的高性能 java 敏感词工具框架sensitive-word 3
- 随心笔记 4
- kafka入门专辑 7
- Websocket专辑 2
- Sentinel专辑 7
- 支付宝支付专辑 3
- Java错误集锦 5
- Web Uploader大文件上传专辑 4
- Mybatis 与 MybatisPlus 专辑 4
- oracle 1
- 达梦数据库 1
- 若依框架专辑 4
- FreeMarker专辑 6
- 电商专辑 1
- 专辑 2
- JAVA十八罗汉 1
- SQL优化专题 6
- MyCat专辑 2
- 简单思考 1
- 学习文档 22
- 腾讯云直播专辑 9
- Skywalking链路追踪 3
- Java面试问题专辑 12
- Java常用工具类专辑 10
- java基础技术及功能 2
- PDF专辑 2
- 网站接入第三方微信扫码登录 3
- Seata分布式事务专辑 2
- Activiti工作流专辑 2
- Linux 1
- Mybatis和MybatisPlus杂记 1
- JMeter专辑 2
- 阿里直播专辑 1
- 面试专辑-数据库篇 1
- 微信登录专辑 1
- MySQL编程指南 3
- Jsoup专辑 6
- MySQL专辑 1
- Apache AB入门 3
- Spring事务专辑 3
- 数据库 1
- 算法 2
- Thymeleaf模版专辑 13
- Java数据加密专辑 4
- Spring框架入门教程 2
- maven专题 6
- JVM专题 9
- 面试专辑高级篇 15
- 面试专辑基础篇 15
- SpringBoot集成Excel的导入导出功能 2
- java设计模式 2
- Apache ECharts使用入门 9
- 分布式框架之zookeeper+dubbo 8
- Java面试专辑 2
- Excel 3
- 微信支付入门 18
- SpringCloud-Alibaba入门专辑 14
- Linux服务器环境配置专辑 8
- SpringCloud-Alibaba 3
- redis葵花宝典 4
- nginx服务器系列 9
- FastDFS专辑 4
- 参码电商平台系统 3
- RabbitMQ由入门到精通 11
- mybatis -plus 7
- IDEA使用技能专辑 10
- MongoDB专辑 6
- Elasticsearch专辑 20
- SSM框架 5
- Redis编程指南 1
- Linux系统常用命令的使用 0
- SpringSecurity安全框架 7
- SpringBoot集成Redis编程 4
- Redis入门专辑 28
- Vue编程专辑 39
- 文件上传到阿里云OSS实战 4
- git源码管理专题 12
- HTTP协议简析 4
- Docker环境搭建专辑 32
- SpringBoot微服务编程专辑 51
- SpringCloud微服务架构 20
- svn源码管理专题 0
- Oracle编程指南 0
- Json编程指南 0
- Spring 实战 0
- 华为高斯(GaussDB)数据库专辑 0
- SpringBoot中的Thymeleaf模板入门 0
- 搭建Window的开发环境 0
- Java语言开发笔记 0
- 微信登录接口专辑 0
Window下搭建ElasticSearch集群
平安
2023-02-16 12:27:41
3409
0
0
0
Es集群搭建
1.复制ES安装包
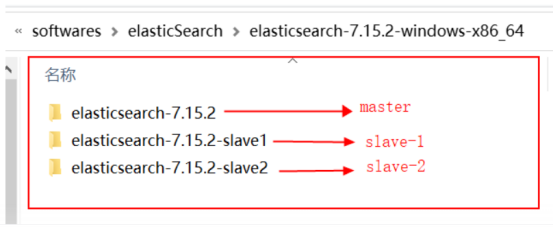
2.在conf文件夹下修改各个节点的elasticsearch.yml文件内容
3.集群名称可自定义 主节点名称定义好后 从节点集群初始化以主节点名称进行配置:
①主节点
# ---------------------------------- Various -----------------------------------
#
# Require explicit names when deleting indices:
#
#action.destructive_requires_name: true

http.cors.enabled: true
http.cors.allow-origin: "*"

# 集群名称
cluster.name: zero
# 节点名称
node.name: master
#当前节点为master
node.master: true

network.host: 127.0.0.1
# 对外端口
http.port: 9200

# 是否存储数据
# node.data: true

# 内部节点直接沟通端口
transport.tcp.port: 9300
# 集群自动发现ip列表
discovery.zen.ping.unicast.hosts: ["127.0.0.1:9300","127.0.0.1:9301","127.0.0.1:9302"]

# 集群初始化以哪个节点作为master
cluster.initial_master_nodes: ["master","slave-1","slave-2"]
②从节点1
# ---------------------------------- Various -----------------------------------
#
# Require explicit names when deleting indices:
#
#action.destructive_requires_name: true

http.cors.enabled: true
http.cors.allow-origin: "*"

# 集群名称
cluster.name: zero
# 节点名称
node.name: slave-1
#当前节点为master
node.master: true

network.host: 127.0.0.1
# 对外端口
http.port: 29201

# 是否存储数据
# node.data: true

# 内部节点直接沟通端口
transport.tcp.port: 9301
# 集群自动发现ip列表
discovery.zen.ping.unicast.hosts: ["localhost:9300","localhost:9301","localhost:9302"]

# 集群初始化以哪个节点作为master
cluster.initial_master_nodes: ["master"]
③从节点2
# ---------------------------------- Various -----------------------------------
#
# Require explicit names when deleting indices:
#
#action.destructive_requires_name: true

http.cors.enabled: true
http.cors.allow-origin: "*"

# 集群名称
cluster.name: zero
# 节点名称
node.name: slave-2
#当前节点为master
node.master: true

network.host: localhost
# 对外端口
http.port: 29202

# 是否存储数据
# node.data: true

# 内部节点直接沟通端口
transport.tcp.port: 9302
# 集群自动发现ip列表
discovery.zen.ping.unicast.hosts: ["localhost:9300","localhost:9301","localhost:9302"]

# 集群初始化以哪个节点作为master
cluster.initial_master_nodes: ["master"]
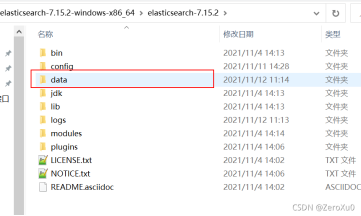
2.清空每个节点安装包data目录里面的内容
3.Kibana配置config目录下的kibana.yml文件
elasticsearch.hosts: ["http://localhost:9200","http://localhost:29201","http://localhost:29202"]
4.elasticsearch-head的安装及使用
https://github.com/mobz/elasticsearch-head/
①通过elasticsearch-head-master进入cmd 输入cnpm install下载依赖
②通过npm run start启动head插件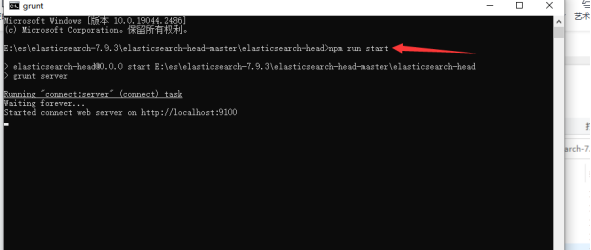
③访问9100 输入主节点端口进行连接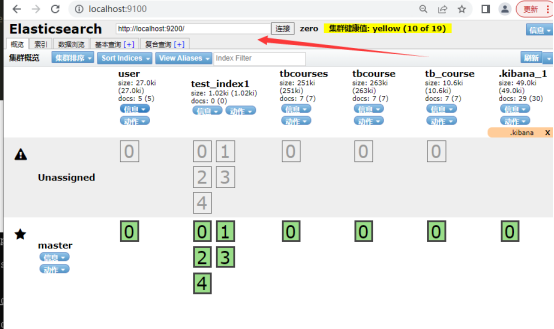
④yml文件里使用默认es配置就可,不用手动配置elasticsearch,,在bootstarp.yml里进行如下配置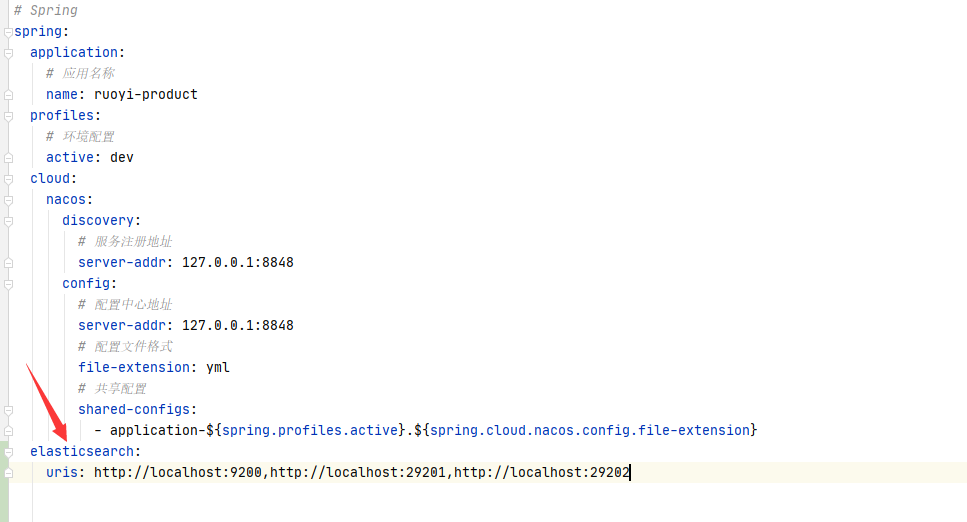
5.通过kibana可视化界面进行ES索引最大返回条数设置
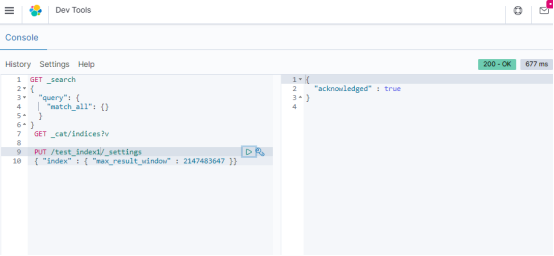
注:test_index1是我自己的索引名称
PUT /test_index/_settings
{"index":{"max_result_window":2147483674}
}
最大返回条数详细信息:https://blog.csdn.net/wikowin/article/details/115260970?ops_request_misc=&request_id=&biz_id=102&utm_term=kibana%E6%9F%A5%E8%AF%A2%E4%B8%80%E4%B8%AA%E7%B4%A2%E5%BC%95%E9%BB%98%E8%AE%A4%E6%9C%80%E5%A4%A7%E8%BF%94%E5%9B%9E%E5%80%BC&utm_medium=distribute.pc_search_result.none-task-blog-2~all~sobaiduweb~default-0-115260970.142%5Ev73%5Econtrol,201%5Ev4%5Eadd_ask,239%5Ev1%5Econtrol&spm=1018.2226.3001.4187