博主
258
258
258
258
专辑
- Cherry Markdown Editor 1
- 面试题 0
- 学习笔记zg5 10
- JAVA理论基础2025版 3
- 学习笔记 1
- DeepSeek+RAGFlow构建个人知识库 5
- 面试专辑2025版 7
- shixun1 7
- java学习历程 0
- java学习历程 0
Window下搭建ElasticSearch集群
平安
2023-02-16 12:27:41
11078
0
0
0
Es集群搭建
1.复制ES安装包
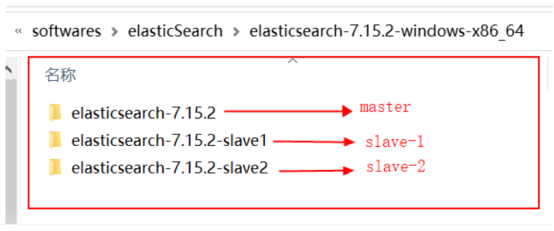
2.在conf文件夹下修改各个节点的elasticsearch.yml文件内容
3.集群名称可自定义 主节点名称定义好后 从节点集群初始化以主节点名称进行配置:
①主节点
# ---------------------------------- Various -----------------------------------
#
# Require explicit names when deleting indices:
#
#action.destructive_requires_name: true

http.cors.enabled: true
http.cors.allow-origin: "*"

# 集群名称
cluster.name: zero
# 节点名称
node.name: master
#当前节点为master
node.master: true

network.host: 127.0.0.1
# 对外端口
http.port: 9200

# 是否存储数据
# node.data: true

# 内部节点直接沟通端口
transport.tcp.port: 9300
# 集群自动发现ip列表
discovery.zen.ping.unicast.hosts: ["127.0.0.1:9300","127.0.0.1:9301","127.0.0.1:9302"]

# 集群初始化以哪个节点作为master
cluster.initial_master_nodes: ["master","slave-1","slave-2"]
②从节点1
# ---------------------------------- Various -----------------------------------
#
# Require explicit names when deleting indices:
#
#action.destructive_requires_name: true

http.cors.enabled: true
http.cors.allow-origin: "*"

# 集群名称
cluster.name: zero
# 节点名称
node.name: slave-1
#当前节点为master
node.master: true

network.host: 127.0.0.1
# 对外端口
http.port: 29201

# 是否存储数据
# node.data: true

# 内部节点直接沟通端口
transport.tcp.port: 9301
# 集群自动发现ip列表
discovery.zen.ping.unicast.hosts: ["localhost:9300","localhost:9301","localhost:9302"]

# 集群初始化以哪个节点作为master
cluster.initial_master_nodes: ["master"]
③从节点2
# ---------------------------------- Various -----------------------------------
#
# Require explicit names when deleting indices:
#
#action.destructive_requires_name: true

http.cors.enabled: true
http.cors.allow-origin: "*"

# 集群名称
cluster.name: zero
# 节点名称
node.name: slave-2
#当前节点为master
node.master: true

network.host: localhost
# 对外端口
http.port: 29202

# 是否存储数据
# node.data: true

# 内部节点直接沟通端口
transport.tcp.port: 9302
# 集群自动发现ip列表
discovery.zen.ping.unicast.hosts: ["localhost:9300","localhost:9301","localhost:9302"]

# 集群初始化以哪个节点作为master
cluster.initial_master_nodes: ["master"]
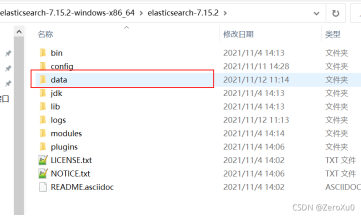
2.清空每个节点安装包data目录里面的内容
3.Kibana配置config目录下的kibana.yml文件
elasticsearch.hosts: ["http://localhost:9200","http://localhost:29201","http://localhost:29202"]
4.elasticsearch-head的安装及使用
https://github.com/mobz/elasticsearch-head/
①通过elasticsearch-head-master进入cmd 输入cnpm install下载依赖
②通过npm run start启动head插件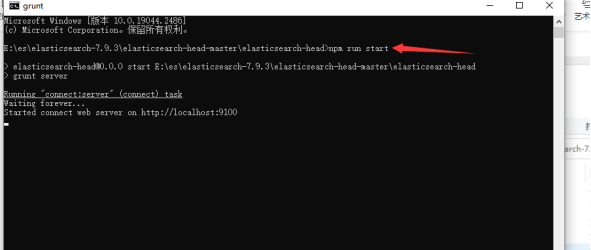
③访问9100 输入主节点端口进行连接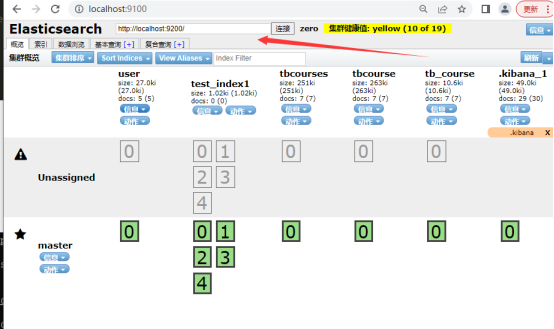
④yml文件里使用默认es配置就可,不用手动配置elasticsearch,,在bootstarp.yml里进行如下配置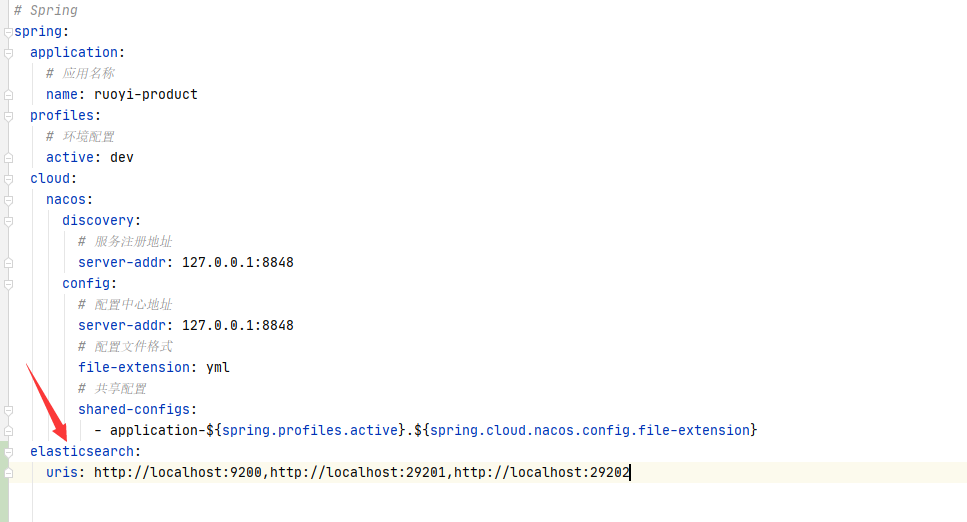
5.通过kibana可视化界面进行ES索引最大返回条数设置
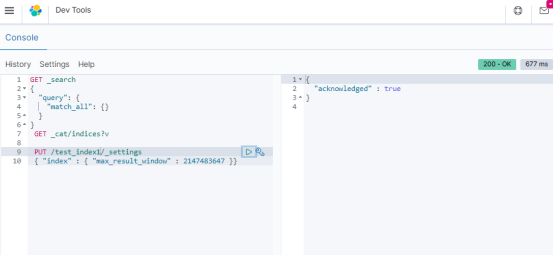
注:test_index1是我自己的索引名称
PUT /test_index/_settings
{"index":{"max_result_window":2147483674}
}
最大返回条数详细信息:https://blog.csdn.net/wikowin/article/details/115260970?ops_request_misc=&request_id=&biz_id=102&utm_term=kibana%E6%9F%A5%E8%AF%A2%E4%B8%80%E4%B8%AA%E7%B4%A2%E5%BC%95%E9%BB%98%E8%AE%A4%E6%9C%80%E5%A4%A7%E8%BF%94%E5%9B%9E%E5%80%BC&utm_medium=distribute.pc_search_result.none-task-blog-2~all~sobaiduweb~default-0-115260970.142%5Ev73%5Econtrol,201%5Ev4%5Eadd_ask,239%5Ev1%5Econtrol&spm=1018.2226.3001.4187