博主
258
258
258
258
专辑
- gradle专辑 1
- javaweb专辑 2
- 学习笔记zg4 33
- hutool工具包的使用 13
- Vue3+Element Plus 12
- 跟着禹神学Vue3 1
- 学习笔记zg2(SpringBoot版) 10
- 学习笔记zg2-马 0
- LayUI专辑 14
- 学习笔记zg1 9
第四节 idea使用Mycat
Serendipity
2023-03-06 10:44:46
10348
0
0
0
idea使用Mycat
🤍使用Sharding-JDBC分库
引入Sharding-JDBC的Jar包
<dependency>
    <groupId>org.apache.shardingsphere</groupId>
    <artifactId>sharding-jdbc-spring-boot-starter</artifactId>
    <version>4.1.0</version>
</dependency>
🔊 properties配置
# 应用名称
spring.application.name=server-user

# 应用服务 WEB 访问端口
server.port=18081

#下面这些内容是为了让MyBatis映射
#指定Mybatis的Mapper文件
mybatis.mapper-locations=classpath:mapper/**.xml
#指定Mybatis的实体目录
mybatis.type-aliases-package=com.zx.*
#mybatis.configuration.log-impl=org.apache.ibatis.logging.stdout.StdOutImpl

#配置两个数据源
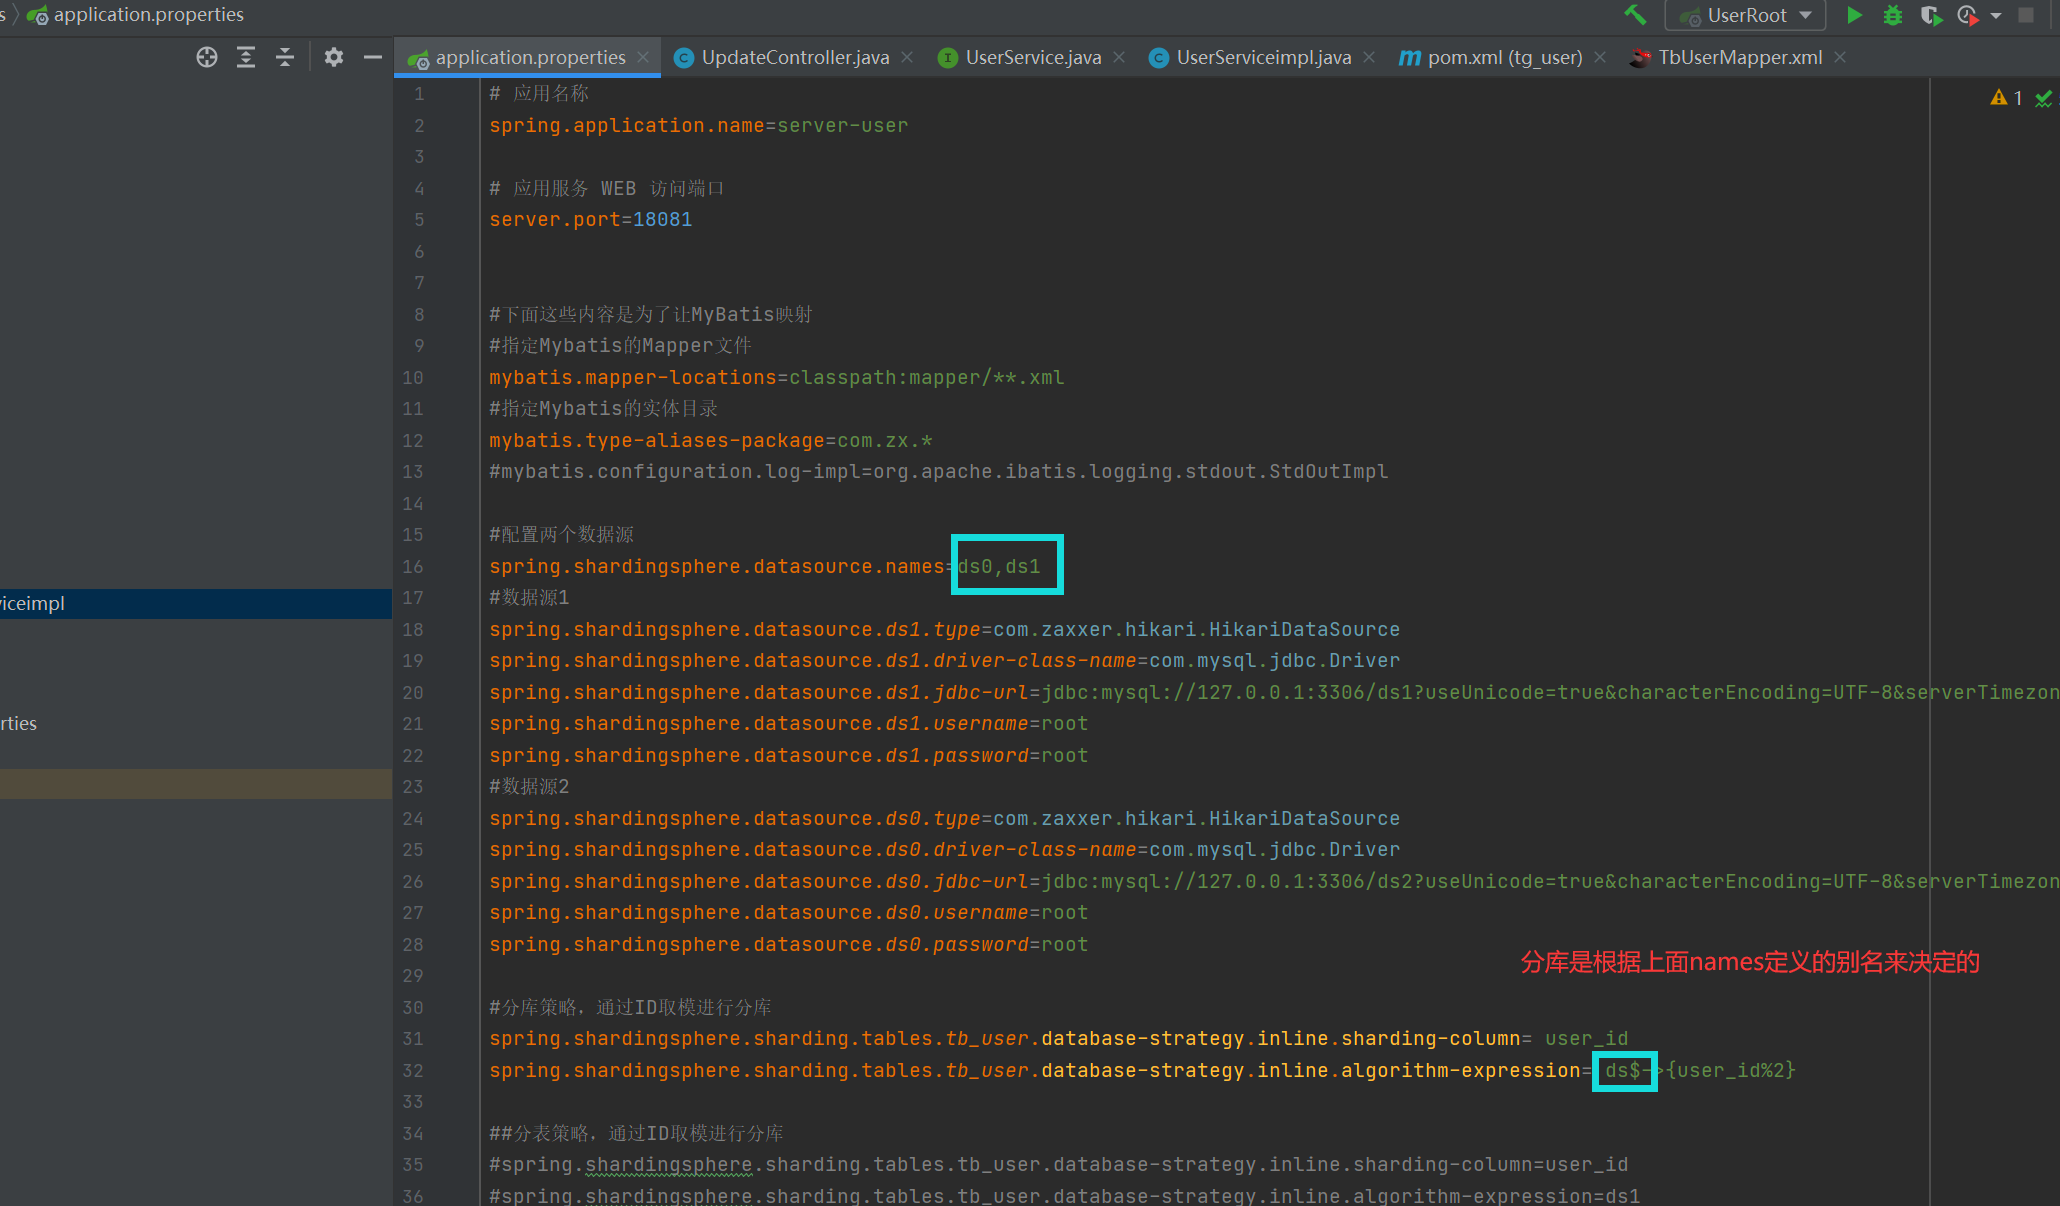
spring.shardingsphere.datasource.names=ds0,ds1
#数据源1
spring.shardingsphere.datasource.ds1.type=com.zaxxer.hikari.HikariDataSource
spring.shardingsphere.datasource.ds1.driver-class-name=com.mysql.jdbc.Driver
spring.shardingsphere.datasource.ds1.jdbc-url=jdbc:mysql://127.0.0.1:3306/ds1?useUnicode=true&characterEncoding=UTF-8&serverTimezone=GMT%2B8&useSSL=false
spring.shardingsphere.datasource.ds1.username=root
spring.shardingsphere.datasource.ds1.password=root
#数据源2
spring.shardingsphere.datasource.ds0.type=com.zaxxer.hikari.HikariDataSource
spring.shardingsphere.datasource.ds0.driver-class-name=com.mysql.jdbc.Driver
spring.shardingsphere.datasource.ds0.jdbc-url=jdbc:mysql://127.0.0.1:3306/ds2?useUnicode=true&characterEncoding=UTF-8&serverTimezone=GMT%2B8&useSSL=false
spring.shardingsphere.datasource.ds0.username=root
spring.shardingsphere.datasource.ds0.password=root
#分库策略,通过ID取模进行分库
spring.shardingsphere.sharding.tables.tb_user.database-strategy.inline.sharding-column= user_id
spring.shardingsphere.sharding.tables.tb_user.database-strategy.inline.algorithm-expression= ds$->{user_id%2}
#SQL结果打印
spring.shardingsphere.props.sql.show=true
spring.main.allow-bean-definition-overriding=true
🔊 测试代码
添加数据时,应带上自己的主键id一块添加
以前怎么写的业务代码还是怎么写,sharding会自动的给分配到对应的数据库。
@RunWith(SpringRunner.class)
@SpringBootTest(classes = ShardingJdbcDemoApplication.class)
public class Test001 {
    @Resource
    private UserMapper userMapper;

    @Test
    public void test() {
        for (int i = 0; i < 10; i++) {
            User user = new User();
            user.setId(i);
            user.setName("张三");
            user.setAge(18);
            userMapper.insert(user);
        }
    }
}
🔊 打印日志
可以看到在写入的时候会根据ID取模自动匹配对应的数据库中进行保存,一个数据库中只保存了奇数ID另一个数据库值保存了偶数ID。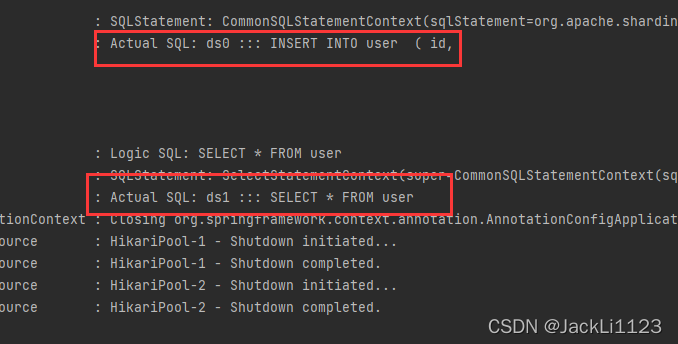
(注:
1.对于分给哪个库,需要加个$占位符,是通过user_id % 2 的余来决定的
2.配置类里面的表名应与数据库的表名一致,不一致虽然不会报错,但是效果不对)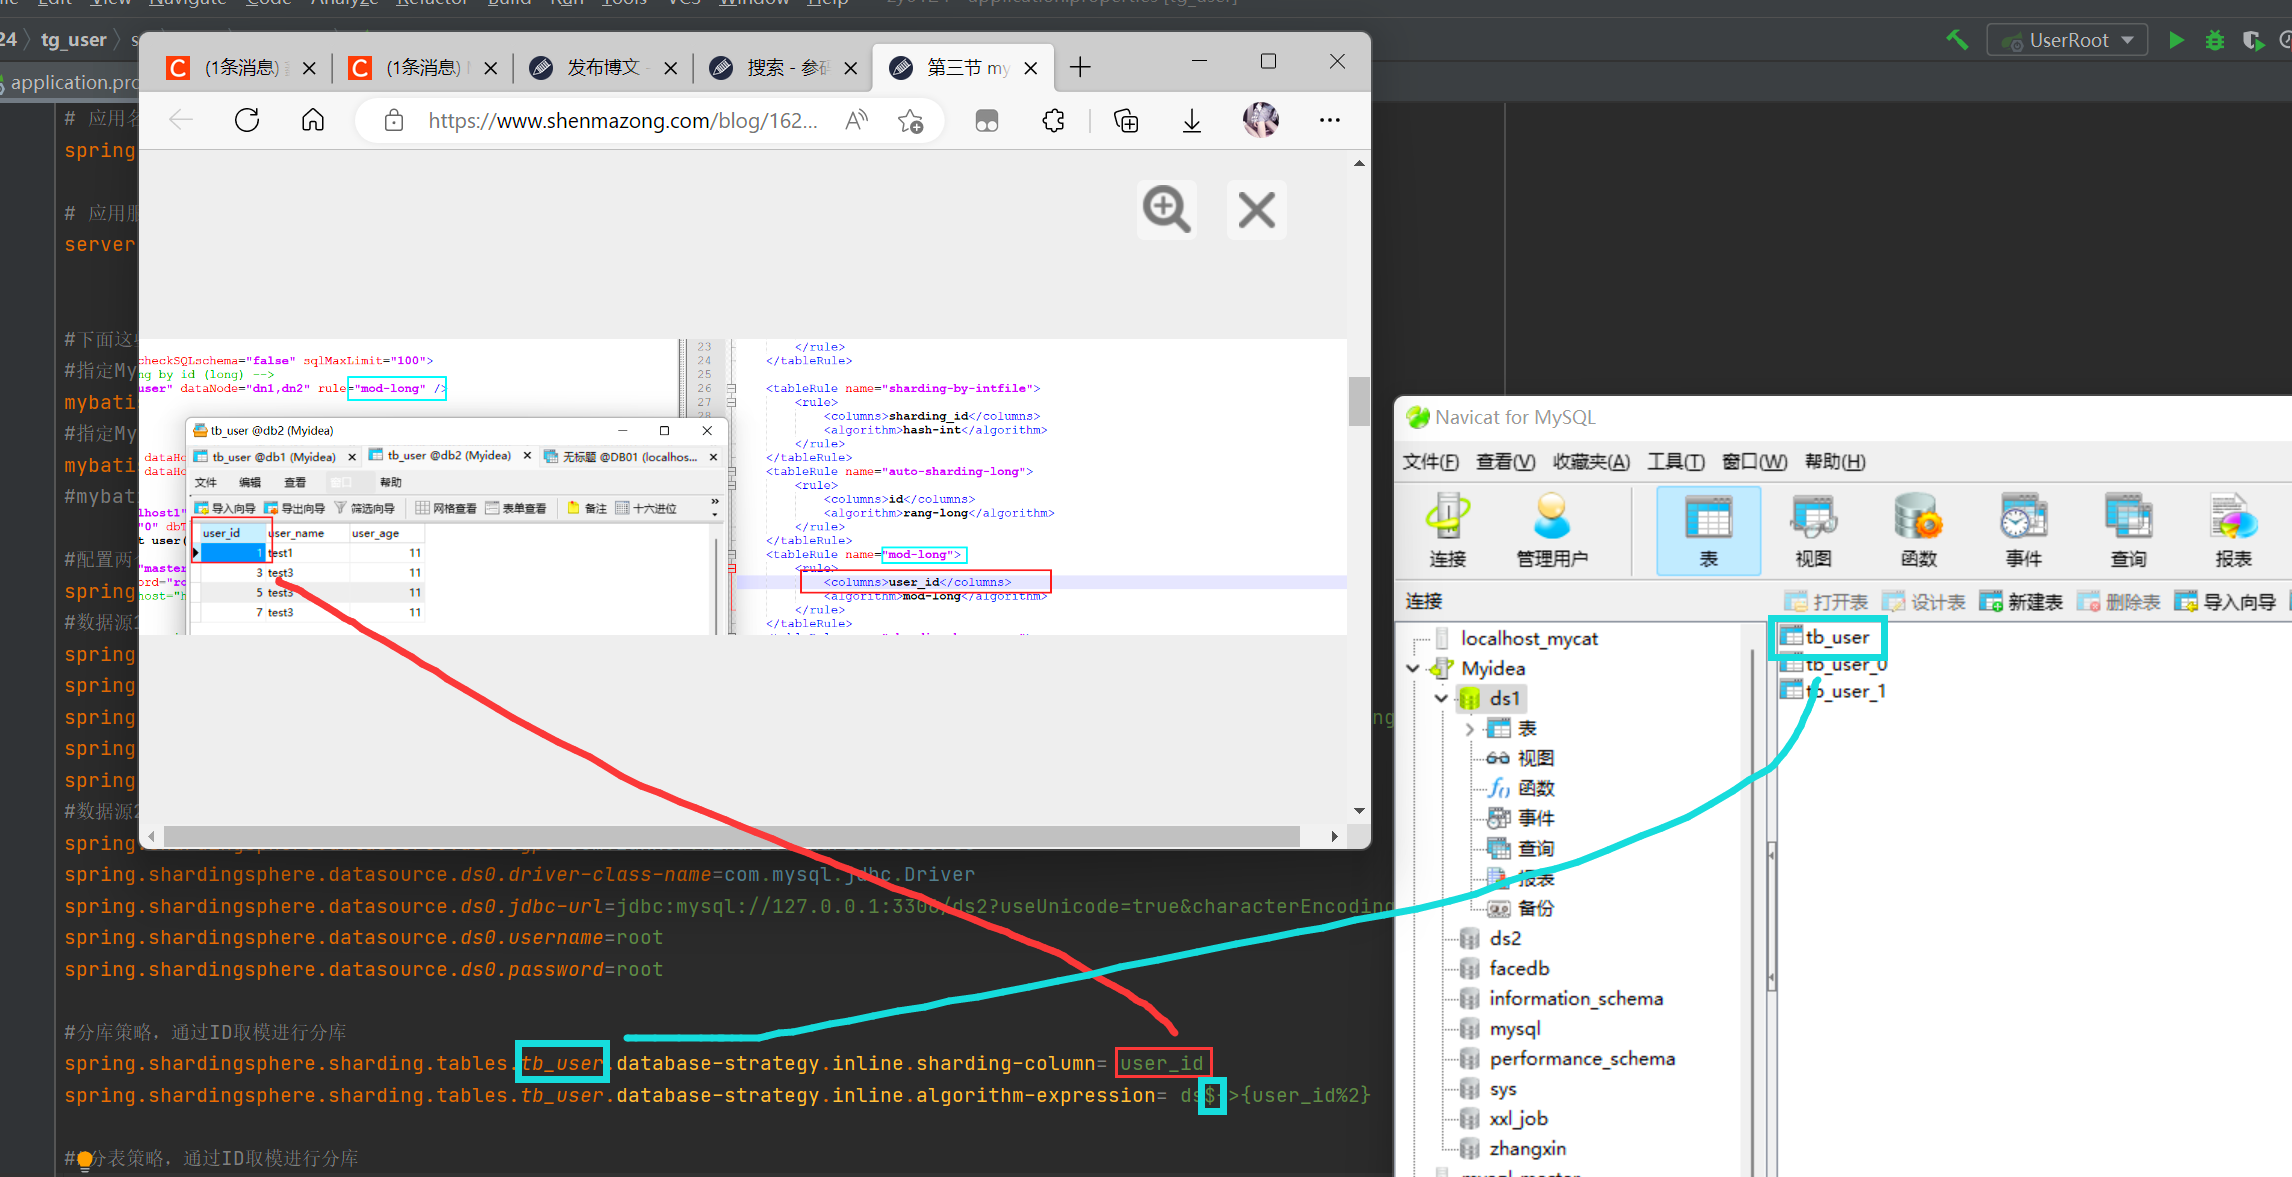
🤍使用Sharding-JDBC分表
🔊 properties配置
咱就不同时分库又分表了,看一下一个库中分表,因为不进行分库,所以给的库是死值(ds1)
#分表策略,通过ID取模进行分库
spring.shardingsphere.sharding.tables.tb_user.database-strategy.inline.sharding-column=user_id
spring.shardingsphere.sharding.tables.tb_user.database-strategy.inline.algorithm-expression=ds1
#数据节点配置
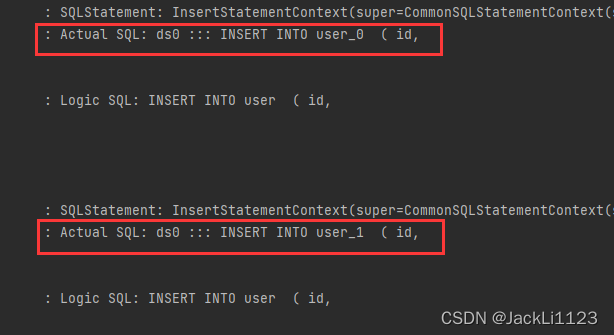
spring.shardingsphere.sharding.tables.tb_user.actual-data-nodes=ds1.tb_user_$->{0..1}
#分表策略,通过ID取模进行分表
spring.shardingsphere.sharding.tables.tb_user.table-strategy.inline.sharding-column=user_id
spring.shardingsphere.sharding.tables.tb_user.table-strategy.inline.algorithm-expression=tb_user_$->{user_id % 2}
🤍使用Sharding-JDBC读写分离
🔊 properties配置
#主数据库配置
spring.shardingsphere.masterslave.name=datasource
spring.shardingsphere.masterslave.master-data-source-name=ds0
#从数据库配置,可以是多个采用负载均衡策略
spring.shardingsphere.masterslave.slave-data-source-names=ds1
spring.shardingsphere.masterslave.load-balance-algorithm-type=ROUND_ROBIN
#使用雪花算法生成ID
spring.shardingsphere.sharding.tables.tb_user.key-generator.column=user_id
spring.shardingsphere.sharding.tables.tb_user.key-generator.type=SNOWFLAKE
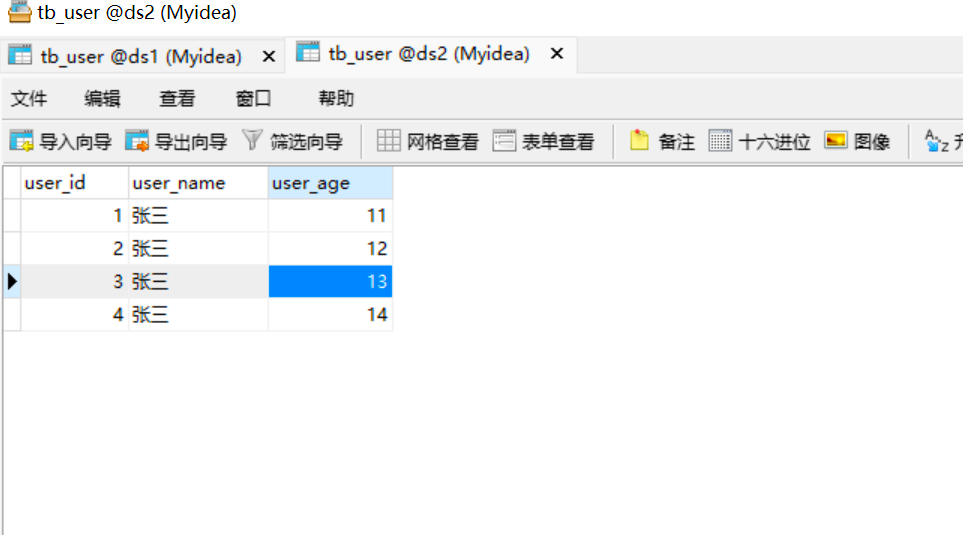

(注:
1.存储值实在ds2里
2.读取的数据是ds1)