博主
258
258
258
258
专辑
- gradle专辑 1
- javaweb专辑 2
- 学习笔记zg4 33
- hutool工具包的使用 13
- Vue3+Element Plus 12
- 跟着禹神学Vue3 1
- 学习笔记zg2(SpringBoot版) 10
- 学习笔记zg2-马 0
- LayUI专辑 14
- 学习笔记zg1 9
课堂笔记20230823
亮子
2023-08-23 03:58:51
10479
0
0
0
SpringBoot集成FreeMarker生成静态页面
1、添加依赖
        <!-- freemarker 生成静态页 依赖-->
        <dependency>
            <groupId>org.springframework.boot</groupId>
            <artifactId>spring-boot-starter-freemarker</artifactId>
        </dependency>
2、修改配置文件
  # freemarker配置
  freemarker:
    cache: false #关闭模板缓存,方便测试
    settings:
      template_update_delay: 0 #检查模板更新延迟时间,设置为0表示立即检查,如果时间大于0会有缓存不方便进行模板测试
    template-loader-path: classpath:/templates
    charset: UTF-8
    check-template-location: true
    suffix: .ftl
    content-type: text/html
    expose-request-attributes: true
    expose-session-attributes: true
    request-context-attribute: request
3、编写模板文件
<!DOCTYPE html>
<html lang="en">
<head>
    <meta charset="UTF-8">
    <title>Title</title>
</head>
<body>
<h1>Hello boy, ${userName}</h1><br>
<p>当前时间:${.now?string("yyyy-MM-dd HH:mm:ss.sss")}</p>

<br/>


<#list tbUsers as tbUser>
    <div>${tbUser.userName},${tbUser.userId},${tbUser.userSex}</div>
</#list>

<#list tbUsers as tbUser>
    <div>${tbUser.userId},${tbUser.userName},${tbUser.userSex}</div>
<#else>
    <div>数据不存在</div>
</#list>

<#list tbUsers as tbUser>
    <#if tbUser.userId==5>
        <div>${tbUser}</div>
    </#if>
</#list>

</body>
</html>
4、编写接口
package com.bw2102a;

import com.bw2102a.pojo.TbUser;
import org.springframework.stereotype.Controller;
import org.springframework.ui.Model;
import org.springframework.web.bind.annotation.GetMapping;

import java.util.ArrayList;
import java.util.HashMap;
import java.util.LinkedHashMap;
import java.util.UUID;

/**
 * @author 军哥
 * @version 1.0
 * @description: FreeController
 * @date 2023/8/23 11:27
 */

@Controller
public class FreeController {

    @GetMapping(value = "/index")
    public String index(Model model) {

        // 增加名字变量
        model.addAttribute("userName", "andy");

        // 准备map变量
        ArrayList<TbUser> tbUsers = new ArrayList<>();

        for (int index = 0; index < 10; index++) {
            TbUser tbUser = new TbUser();
            tbUser.setUserId(index);
            tbUser.setUserName(UUID.randomUUID().toString());
            tbUser.setUserSex(0);

            tbUsers.add(tbUser);
        }


        model.addAttribute("tbUsers", tbUsers);

        return "index";
    }

}
5、模板指令
- list
- if
使用docker安装nginx
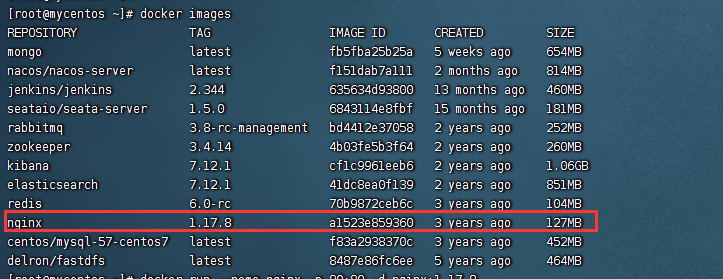
1、下载镜像
docker pull nginx:1.17.8
2、创建测试容器
docker run --name nginx -p 80:80 -d nginx:1.17.8

3、测试镜像
http://192.168.80.131

4、容器部署
1)、创建目录
# 创建www目录
mkdir -p /server/nginx/html
# 创建日志目录
mkdir -p /server/nginx/logs
# 创建配置目录
mkdir -p /server/nginx/conf
2)、从测试容器中拷贝配置文件到宿主机上
docker cp nginx:/etc/nginx/nginx.conf /server/nginx/conf/nginx.conf
3)、停止并删除测试容器
docker stop nginx
docker rm nginx
4)、创建正式的容器
docker run -d -p 80:80 -p 443:443 --name nginx -v /server/nginx/html:/usr/share/nginx/html -v /server/nginx/conf/nginx.conf:/etc/nginx/nginx.conf -v /server/nginx/logs:/var/log/nginx --privileged=true nginx:1.17.8
配置nginx虚拟主机
1)、修改nginx的配置文件
配置文件的位置:
/server/nginx/conf/nginx.conf
user  nginx;
worker_processes  1;

error_log  /var/log/nginx/error.log warn;
pid        /var/run/nginx.pid;


events {
    worker_connections  1024;
}


http {
    include       /etc/nginx/mime.types;
    default_type  application/octet-stream;

    log_format  main  '$remote_addr - $remote_user [$time_local] "$request" '
                      '$status $body_bytes_sent "$http_referer" '
                      '"$http_user_agent" "$http_x_forwarded_for"';

    access_log  /var/log/nginx/access.log  main;

    sendfile        on;
    #tcp_nopush     on;

    keepalive_timeout  65;

    #gzip  on;

    include /etc/nginx/conf.d/*.conf;

	# www.hanguotao.com
    server {
        listen       80;
        server_name  www.hanguotao.com;
        root         /usr/share/nginx/html/www.hanguotao.com;

        # Load configuration files for the default server block.
        # include /etc/nginx/default.d/*.conf;

        location / {
            root    /usr/share/nginx/html/www.hanguotao.com;
            index   index.html index.htm;
        }

        error_page 404 /404.html;
            location = /40x.html {
        }

        error_page 500 502 503 504 /50x.html;
            location = /50x.html {
        }
    }
}
2)、重启容器让配置生效
docker exec -it nginx nginx -s reload
docker stop nginx
docker start nginx
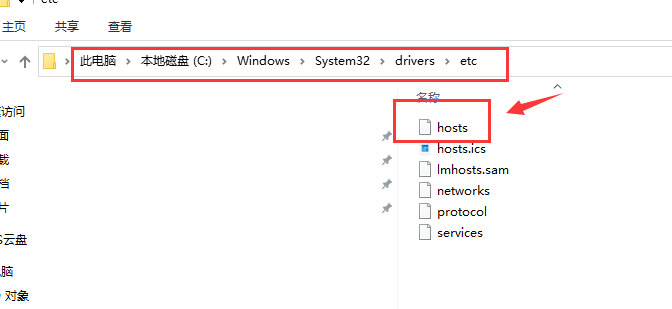
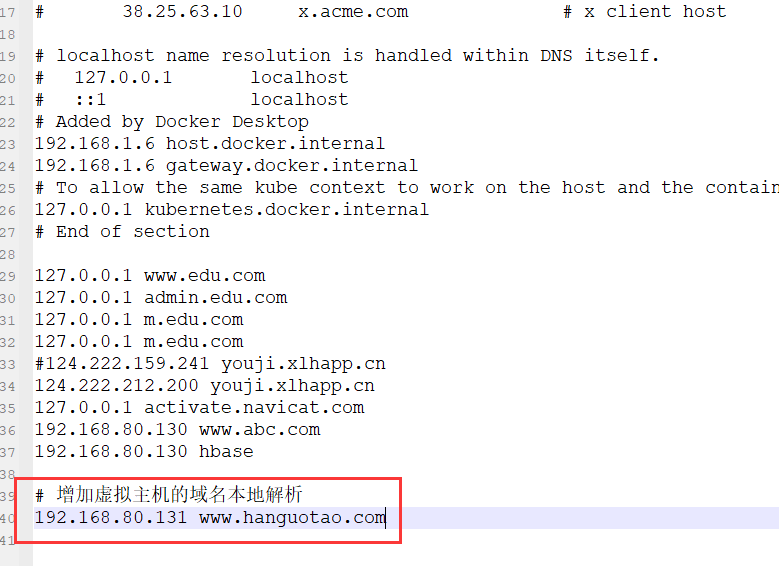
3)、修改host文件
项目上线
1、打包
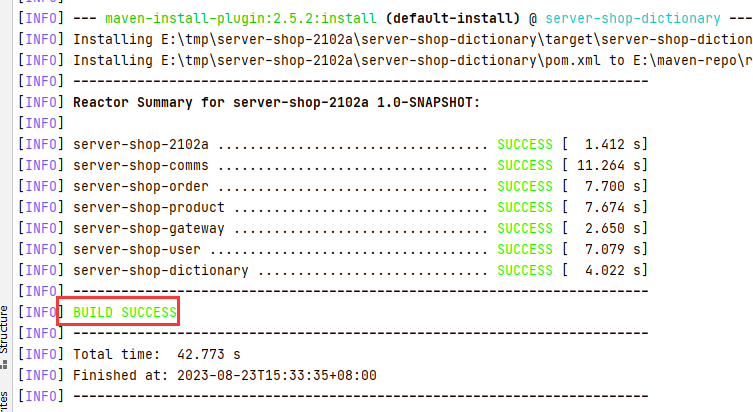
mvn clean install -DskipTests
2、把jar包上传到服务器
1)、通过工具上传jar
2)、运行jar
# 运行jar包
nohup java -jar xxx.jar > /dev/null 2>&1 &

# 查看jar包是否运行
ps aux|grep xxx
3)、查看日志
cat xxx.log
tail -f xxx.log
more xxx.log
less xxx.log
vi xxx.log
head xxx.log
freemarker工具类的修改
package com.bw2102a.utils;

import freemarker.template.Configuration;
import freemarker.template.Template;
import freemarker.template.TemplateException;
import org.apache.commons.io.IOUtils;
import org.springframework.ui.freemarker.FreeMarkerTemplateUtils;

import java.io.File;
import java.io.FileOutputStream;
import java.io.IOException;
import java.io.InputStream;
import java.util.HashMap;
import java.util.UUID;

/**
 * 小马哥(Monte)
 */
public class FreemarkerUtil {

    /**
     *
     * @param conHashMap 模板参数
     * @param templateName 模板名
     * @param outputFilePath 输出路径+名称+后缀
     * @return
     * @throws IOException
     * @throws TemplateException
     */
    public String createHtml(HashMap<String, Object> conHashMap, String templateName, String outputFilePath) throws IOException, TemplateException {

        //创建配置类
        Configuration configuration = new Configuration(Configuration.getVersion());

        // 获取resources路径
//        String classpath = this.getClass().getResource("/").getPath();

        // 配置模板路径
//        configuration.setDirectoryForTemplateLoading(new File(classpath + "/templates/"));
        configuration.setDirectoryForTemplateLoading(new File("/server/nginx/templates/"));

        // 获取模板
        Template template = configuration.getTemplate(templateName+".ftl");

        // 给模板设置值
        String content = FreeMarkerTemplateUtils.processTemplateIntoString(template, conHashMap);

        InputStream inputStream = IOUtils.toInputStream(content);

        //输出文件
        FileOutputStream fileOutputStream = new FileOutputStream(
                new File(outputFilePath)
        );
        int copy = IOUtils.copy(inputStream, fileOutputStream);

        return outputFilePath;

    }

    public String freemarkerCreateHtml() throws TemplateException, IOException {
        FreemarkerUtil freemarkerUtil = new FreemarkerUtil();
        HashMap<String, Object> hashMap = new HashMap<>();
        hashMap.put("title", "名字");
        hashMap.put("content", "内容");
        return freemarkerUtil.createHtml(hashMap, "new", "E:\\授课\\专高5资料\\"+ UUID.randomUUID().toString() +".html");

    }

}
SpringBoot日志
https://www.shenmazong.com/blog/1392112848421982208
nginx的反向代理
https://www.shenmazong.com/blog/1422198516279848960
